
3 Step Nose Side View Drawing Tutorial
3 Step Nose Side View Drawing Tutorial
This quick tutorial shows the basics of drawing a nose from the side view in three steps going from a rough sketch to a shaded drawing.

Drawing the shape of the nose from the side view is not overly complicated but shading the nose can be a little tricky. You can see a preview of the drawing steps in the above picture.
Just like the example images it’s recommended that you do this tutorial in pencil.
Step 1 – Rough Shape Sketch
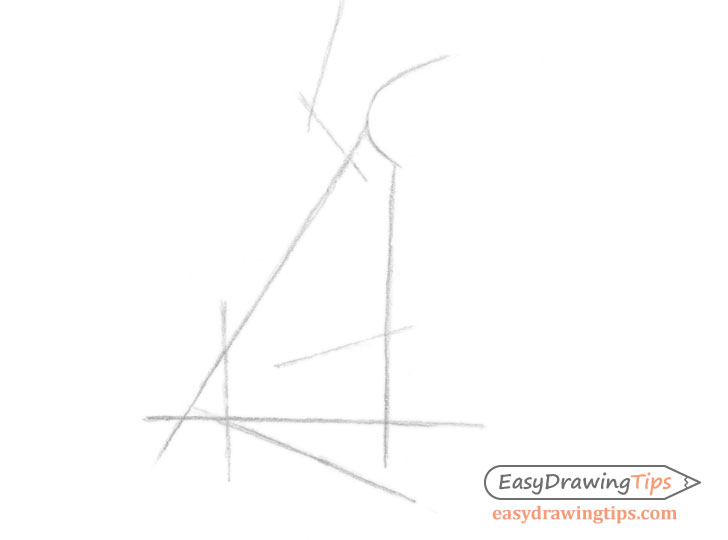
Start the side view drawing of the nose by first doing a rough construction sketch to establish the width, height and angle of the slope of the nose. The shape is similar to a triangle with the tip cut off.
The goal of this step is to get the correct overall shape and proportion of the nose.
Step 2 -Drawing Side View Nose Outline
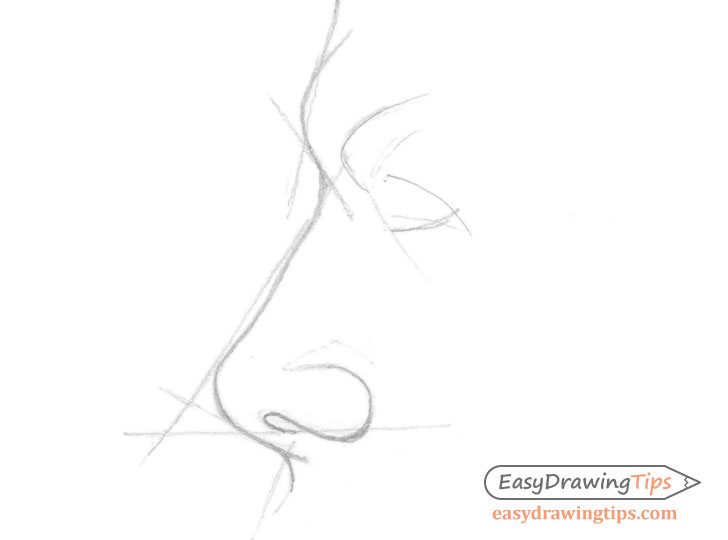
Once you feel you have the correct proportions you can use the construction frame to create a more organic line drawing of the nose. This example also adds a bit of the eye/upper area of the head as the nose pretty much merges into those areas of the face.
Step 3 – Nose Side View Shading

When shading anything including a nose it helps to first to establish the lighting conditions. In this case the lightly will be coming from the top left side of the drawing (front of the nose). The darkest shadows will be below the nose, behind the nostrils, around the area of the eyes and at the bridge of the nose. The more an area is facing away form the light the darker the shadows will be. The nostrils for example will be one of the darkest areas.
Generally in most common lighting conditions the areas described above will always tend to have the darkest shadows.
Conclusion
Noses can vary in shape and size but the tips provided in this tutorial can apply to drawing any nose as well as drawing anything in general. Always start with a simple sketch of the major shape/shapes you are drawing and work your way down to the details. Getting the right proportions and shape of what you are drawing early is the right way to draw. Otherwise you may end up catching your mistakes late in the drawing process and having to undo a lot of time consuming work.
For ore on drawing noses see:
For other facial features see:


